Joining program

Since I was downloading a couple of files that needed to be joined together, I thought that I would write a bash script to do this for me.

The file that I was getting was from a friend whom had created a home movie of his son walking but could not send the whole thing but had to send in parts, he used a program called HJSplit, but I wanted to join them together using just linux command line commands. So after doing that I have done a small bash script that will do a similar task for me every-time without needing to type in a few commands.

#!/bin/bash
# Ian Porter : http://www.codingfriends.com
# joining program, that will join files together similar to hjsplit.
 
# get the input values
input=$1
output=$2
 
# if input is equal to 2 parameters then
if [ $# -eq 2 ]
then
        # ls all of the files that meet the requirements of the 1st parameter
        for i in `ls $input*`;
        do
                echo "Adding file $i to $output"
                cat $i >> $output
        done
else
        echo "input filename(s) | output filename"
        echo "..."
        echo "example arv arv.avi"
        echo "Please input the searchable filename and the output filename"
fi

If you save that as hj.sh and then change the execute writes on it

chmod 755 hj.sh

This will allow you to run the program without typing in sh , to use it for example just use

./hj.sh files_to_join big_file

4GB – 32bit northbridge BAR1 error

With the Laptop that I have, it appears to have a 32 bit northbridge with a 64 bit cpu’s, I have logged this error with the PCI kernel group because hopefully they will be able to give some advice and also I am giving data back to the Linux group on the whole.

Shall put any advice on the kernel PCI group list back on this page regarding the error, if anyone wants to look over the 2GB/4GB dmesg + /proc/iomem files just say.

“I have a acer aspire 9815 with from what I have read a 32bit Northbridge and when you add 4GB of RAM with a nVidia 256 of “virtual
ram” causes a base address registers (BAR1), but works fine with 2GB because there is a problem with the way that Linux kernel is
allocating the memory associated with the devices and places then out of range.

Here is my lspci for the PCI host bridge

Host bridge: Intel Corporation Mobile 945GM/PM/GMS, 943/940GML and
945GT Express Memory Controller Hub (rev 03)
PCI bridge: Intel Corporation Mobile 945GM/PM/GMS, 943/940GML and
945GT Express PCI Express Root Port (rev 03)

From this website it appears that some one was trying to update the PCI IOMEM part of the kernl

http://tjworld.net/wiki/Linux/PCIDynamicResourceAllocationManagement

but says that it will be in the .30 / .31 kernel but I am not able to still use the 4GB of ram and I am using the 2.6.31-10-generic
#35-Ubuntu SMP Tue Sep 22 17:33:42 UTC 2009 i686 GNU/Linux from a kubuntu 9.10 setup and was hoping to have the fix already applied.

Was wondering since I am using the k/ubuntu kernel does the “real” kernel have the PCI IOMEM Upgrade ? or do I have pass some kernel
parameters on grub to allow for this to work correctly ? or has there been another upgrade to the PCI structure that will come in a later
release ?

Also there was some advice to update the BIOS for some laptops and set the upper memory limit, does this make the PC memory have a virtual
head to it and thus the OS will not see the rest of RAM ? or is it just for the PCI setup aspects that look at the upper memory limit and
the rest of the OS can see the and use the rest of the RAM ?

Any advice would be great.”

UPDATE

The only advice was that how about trying out the 64bit kernel, which is what I am using.

SugarCRM hook – what are they

SugarCRM is a very nice and open source CRM (Customer relationship management) system. And with being open source means that you are able to alter the internals of it and also are able to write modules for it easier than closed source applications because you can follow the direction of things if you are for example debugging etc.

The hooks part of the sugarCRM setup allows to place your own code into the base code at set parts of execution e.g. after retrieve of data, or post processing of data updates.

Here is a link to the sugarcrm site of hooks definitions. Basically there is 3 main types, with subhooks attached to those types.

  • Application hooks
    • after_ui_frame – Fired after the frame has been invoked and before the footer has been invoked
    • after_ui_footer – Fired after the footer has been invoked
    • server_round_trip – Fired at the end of every SugarCRM page
  • Module hooks
    • before_delete – Fired before a record is deleted
    • after_delete – Fired after a record is deleted
    • before_restore – Fired before a record is undeleted
    • after_restore – Fired after a record is undeleted
    • after_retrieve – Fired after a record has been retrieved from the database. This hook does not fire when you create a new record.
    • before_save – Fired before a record is saved.
    • after_save – Fired after a record is saved.
    • process_record – Fired immediately prior to the database query resulting in a record being made current. This gives developers an opportunity to examine and tailor the underlying queries. This is also a perfect place to set values in a record

Linux – memory and where is it

To find out what memory you have onboard and also where it is, here is a neat command

lshw -class memory

Here is my output

  *-firmware                                 
       description: BIOS
       vendor: Acer
       physical id: 0
       version: V2.04 (01/15/07)
       size: 103KiB
       capabilities: isa pci pcmcia pnp apm upgrade shadowing escd cdboot acpi usb agp biosbootspecification
  *-cache:0
       description: L1 cache
       physical id: 5
       slot: L1 Cache
       size: 16KiB
       capacity: 16KiB
       capabilities: asynchronous internal write-back
  *-cache:1
       description: L2 cache
       physical id: 6
       slot: L2 Cache
       size: 4MiB
       capabilities: burst external write-back
  *-memory
       description: System Memory
       physical id: 12
       slot: System board or motherboard
       size: 2GiB
     *-bank:0
          description: SODIMM Synchronous
          physical id: 0
          slot: M1
          size: 1GiB
          width: 32 bits
     *-bank:1
          description: SODIMM Synchronous
          physical id: 1
          slot: M2
          size: 1GiB
          width: 32 bits

I basically have 2GiB of memory and also L1 cache (on die cache on the cpu) of 16KiB and 4MiB L2 Cache.

Here is a wiki page that details what L1 and L2 cache are CPU cache, basically L1 means on CPU die, and L2 means slightly further away from the L1 cache. If there is a memory call L1 is the first hit, then L2 and then the memory and then swap space (harddrive), the lower down the line means slower result time.

SugarCRM add a new menu item

SugarCRM is a very nice and open source CRM (Customer relationship management) system. Being open source means that you are more than welcome to add/alter your own modules to it. I am going to do some modules which add in some basic information and how-to’s. This how to is how to add to a left menu item and in this case a account main menu left menu item.

Also going to be doing a module for it, so that you can upload to different SugarCRM’s that you may have, e.g. development version and live version.

The module consists of the main manifest.php file which holds all of the main details, module name author, description etc and also the install definitions.

Here is a basic manifest.php file that has the main details and install definitions for adding a menu item to the Accounts module.

<?php
$manifest = array(
  'acceptable_sugar_flavors' => array(
          0 => 'CE',
          1 => 'PRO',
          2 => 'ENT',
          3 => 'DEV'
        ),
    'acceptable_sugar_versions' => array (
        'regex_matches' => array (
            0 => "5\.*\.*.*"
        ),
    ),
 
    'name'              => 'Accounts insert left menu addition',
    'description'       => 'This module inserts a left menu addition',
    'author'            => 'Ian Porter',
    'published_date'    => '2009/06/01',
    'version'           => '0.1',
    'type'              => 'module',
    'icon'              => '',
    'is_uninstallable'   => 1,
    'silent' => true,
);
 
$installdefs = array (
  'id' => 'AccountsLeftMenu',
    'vardefs'=> array( ),
  'custom_fields' =>  array (  ),
  'copy' =>
  array ( ),
'menu'=> array(
array('from'=> '<basepath>/Menu.php',
'to_module'=> 'Accounts', ),
),
       'beans'=> array (
                 ),
  'language' => 
  array (
  ),
);
?>

As you can see from the above code, the acceptable sugar flavors means any of the version types of sugar, development, pro etc.. and the acceptable sugar versions means which version of sugar e.g. version 4.1.2 or 5.etc. the name etc speaks for itself really.

The installdefs are what happens with the files and such when the module is installed, id is the name of the module, the one that we are focusing in on is menu, this will insert the code below into the a set menu module (this case the Accounts menu structure).

Here is the Menu.php file

<?php
if(!defined('sugarEntry') || !sugarEntry) die('Not A Valid Entry Point'); 
 
/* licence and you stuff */
 
global $mod_strings, $app_strings, $sugar_config, $current_user;
 
/* you need to create the DetailViewPersonal.php file to communicate with */
 
if(ACLController::checkAccess('Accounts', 'edit', true)) {
    $module_menu[]=Array("index.php?module=Accounts&action=DetailViewPersonal&return_module=Accounts&return_action=DetailView&record=".$current_user->id, "Personal View",  'Accounts');
}
?>

The ACLController will check the access level of the user for editable, ACL(Access Control Level), and if so place a new menu below called “Personal View”, the action in the module_menu array is what is called and thus you will need to have a DetialViewPersonal.php in the modules/Accounts directory, but this was just a how to, of how to insert a menu item and not the underlying code.

There is more to come!.

DeVeDe – convert video files to DVD’s

To convert video files into Video DVD’s for general usage well there is allot of applications out there that can do the job, command line (bash) if you want to or just use a GUI. I personally used to use a commmand line but now I am using a GUI because personally it just is as easy and sometimes it is nice to use a gui and not have to think as such.

The application that I use is called DeVeDe and it just makes the conversion very nice. Here is a step by step guide to use it.

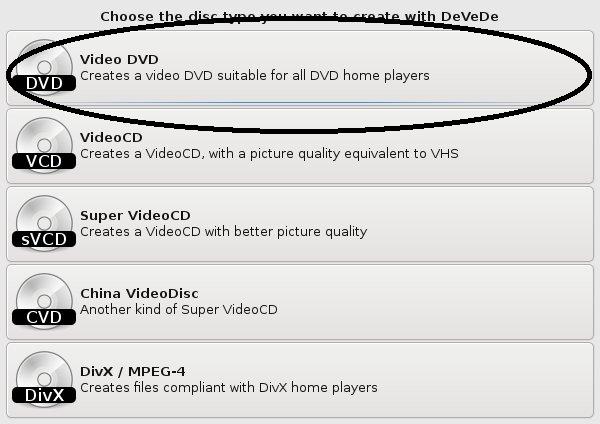
Here is the output types that you can choose from, I have never used anything else but Video DVD.

Type of output

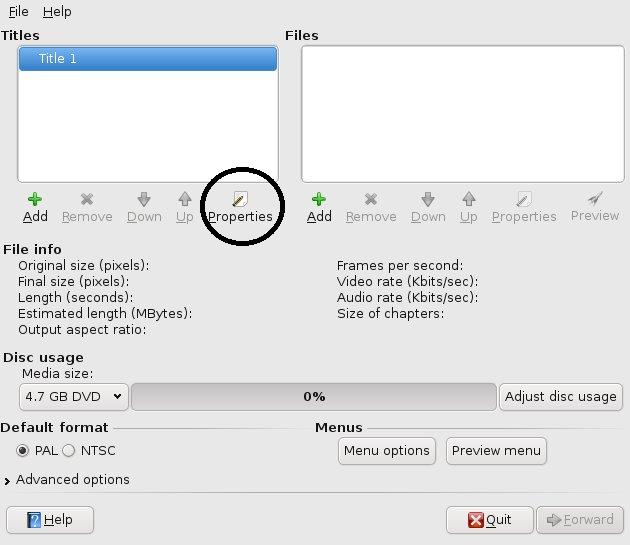
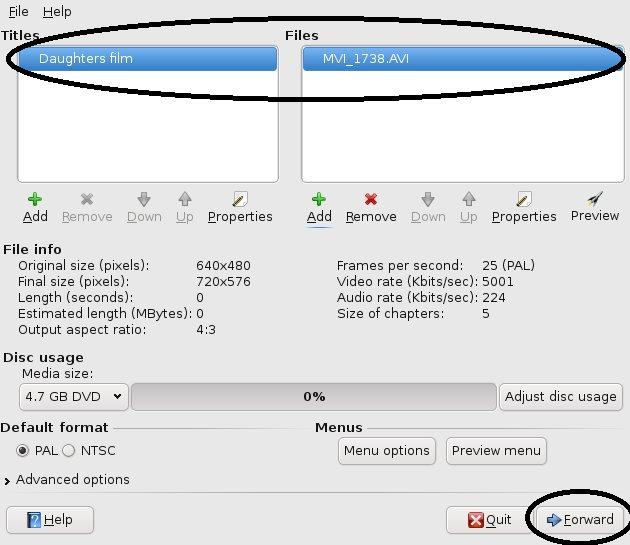
Start the create of the DVD structure, e.g. files and titles names.

The Title of the film

Properties of the title name(s) that you would like to come up on the main menu of the DVD.

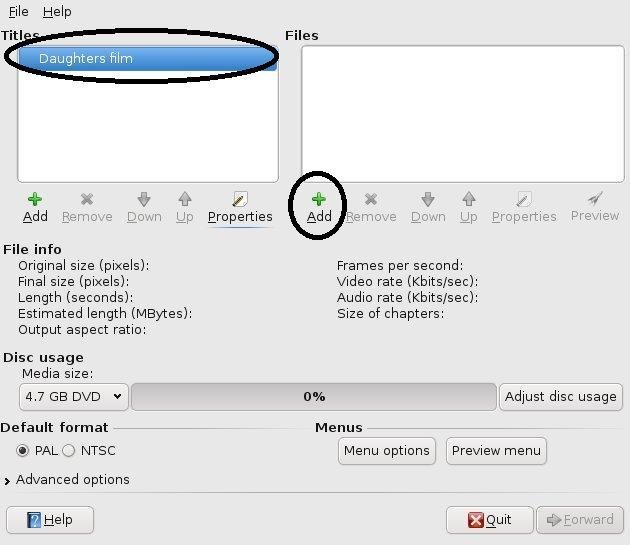
Add the film

Add the files that you want to associated with the title on the main menu of the DVD, these could be of any type of file Xvid, MPEG, etc.

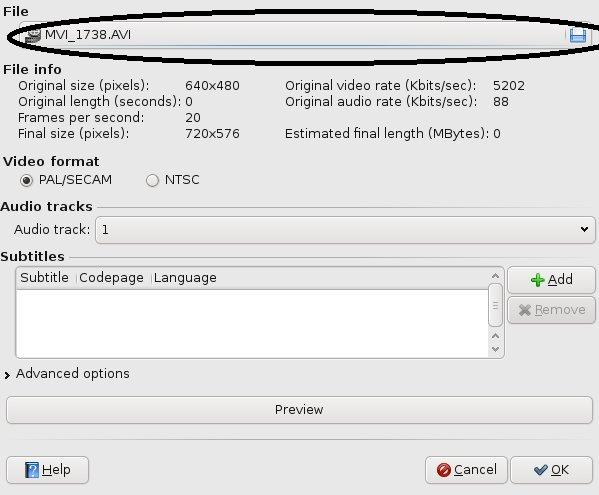
Pick the video

Titles and the files that are associated with the DVD structure.

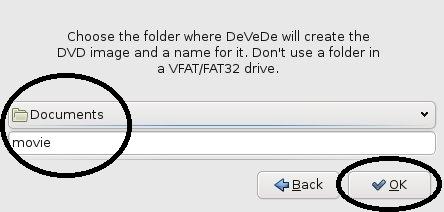
Create the video

Create the DVD, this will progress to where to place the ISO image of the DVD structure.

The name of the files for temporary usage

Create the Full DVD Structure

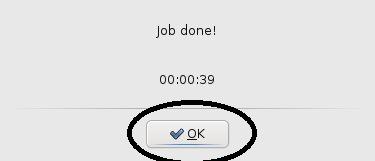
Job done!

Finished!! all done.

Create DVD Properties Properties Title Properties Titles and file Create DVD Create DVD file names Create DVD files Finish

Virtual Box

After looking over the virtualization with different setups, KVM and VirtualBox I decided to use the virtualbox method because it just appeared to be nicer and with a nice GUI per machine just felt nice.

With the additions of the Guest Additions to allow for sharing of folders from the host machine to the virtual one and also the mouse was no longer taken within the virtual machine, I just liked it and to setup a bridge for the virtual machine to use for the networking I created a small script that does the job of deleting the KVM inserting modules into K/Ubuntu.

Here it is

#!/bin/sh
 
# to remove any kernel modules for kvm and then bring up the bridge for eth0
TMP=`lsmod | grep kvm`
RESULT=`echo $TMP | cut -d \  -f 1,4`
 
if [ -n "$RESULT" ]; then
 
        for i in 1 2
        do
                rmmod `echo $RESULT | cut -d \  -f $i`
        done
else
        echo "No kernel modules"
fi
 
# setup the eth0 for working with the bridge
ifconfig eth0 0.0.0.0
#ifconfig br0 down
 
#setup the bridge and bring it up
brctl addbr br0
brctl addif br0 eth0
 
ifconfig br0 up